The Build
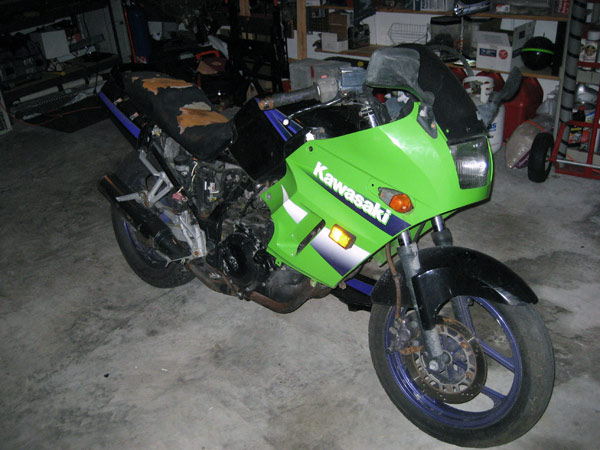
Building the Sensei started well before the design was complete, since design depended on the existing frame. The "Donor bike" was a 1995 Kawasaki Ninja 250 that had definitely seen better days. When I found it, the fairings were damaged, the seat was ripped up, there was a hole in the fuel tank where an extra-long replacement fairing screw was driven through the sheet metal, fuel hoses were missing, the chain was rusted, tires were bald and the keyswitch was thrashed from being forced with a screwdriver. It had been sitting for a couple of years out behind a mobile home and had changed hands at least twice with no title - but the seller only wanted $250 and the VIN checked clean with the police and national insurance database.
After a little hunting I found the last titled owner who met me at his local tax collector's office to process the title paperwork ($80) and I was good to go. If he hadn't replied to the tax collector's letter I could have petitioned the court for a new title (about $60 in court fees). If the bike had been listed as destroyed, I would have had to get it inspected after it was built, and have a new VIN issued for a "built from parts" title. Getting used and custom motorcycles registered for street use is different in every state. Some states have red tape that makes a perfectly good or salvagable vehicle unable to ever be re-registered for on-street use, so that's an issue to research first, before doing anything with a frame (registrations are tied to the VIN of each frame).
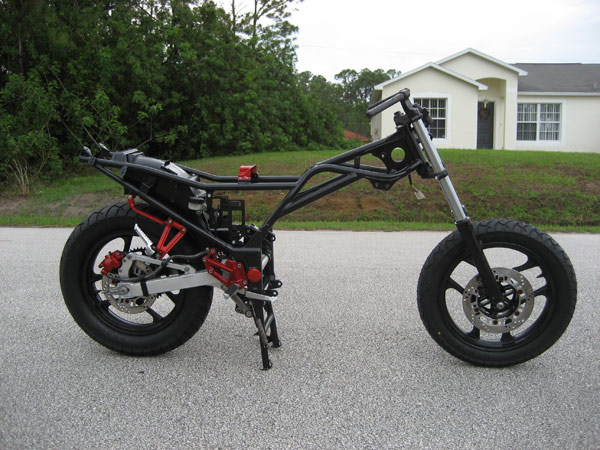
After a complete strip down, cleaning, painting and rebuilding with a new set of tires and addition of diagonal support braces around frame's narrowest point (to replace the rigidity provided by the engine and gearbox) the frame and suspension looked practically brand new.
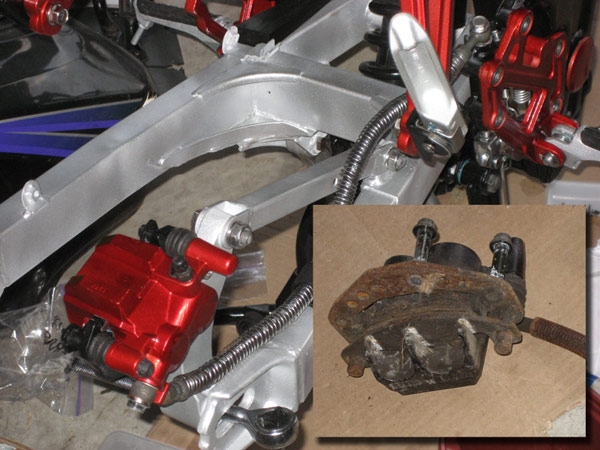
With no small amount of effort, components like the brakes went from nasty and non-functional to working and good looking.
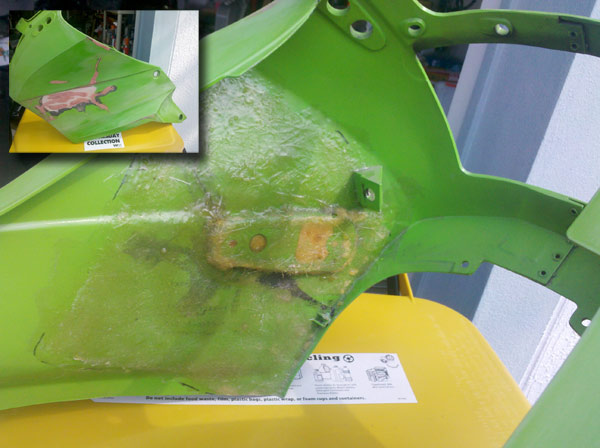
Cutting away the lower half of the front fairing, not replacing the missing lower fairing and ditching the side fairings and rear cowl gave the bike a more lean and modern look compared to the '96 Ninjette which was as design from the 1980s. The front fairing had some significant damage, so before painting, the cracks were cleaned up and glued together with ABS cement, then fiberglassed over the back for rigidity. Since I decided to use new mirrors with integrated turn signals that are placed higher for better visibility, I also filled in the turn signal mount points, along with the cracks.
Continue to Build Page 2...